

About Dialogflow
Dialogflow CX tutorial for beginners Part 1
Let’s begin the Appointment Chatbot development.
1. Google signup
To start using Dialogflow you need to have a Google Account. If you already use Gmail, you can log in using that account. Or you can create a new Google account.
2. Create a Project
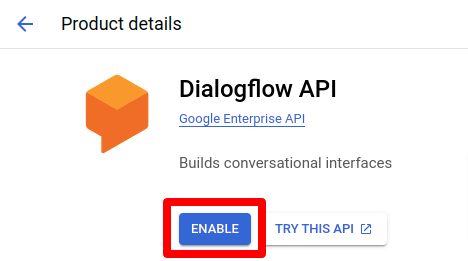
To start with a new chatbot development in Dialogflow, we need to create a project. And make sure that Dialogflow API is enabled from your Google Cloud Console.

If your API is not enabled refer to this https://support.google.com/googleapi/answer/6158841?hl=en document. And Enable Dialogflow API.
3. Create an Agent
To start with a new chatbot development in Dialogflow, we need to create an agent.
Provide a name for your agent and select the default timezone. Choose the default language as per your preference.


4. Creat Intent
To create a new intent select the manage tab and click on the intents after clicking it click + symbol next to intents menu.

Enter the Intent name and under the Training Phrases section, we can see the textbox “Add user expression”. Enter your training phrases and click the save button.

You need to enter training phrases as per the intent. You need to decide what type of user input will invoke this intent. For example, for this book appointment intent, I have added “book appointment” and “book”.
5. What is Page?
Page is a fundamental building block of a conversation flow. A page represents a distinct step or stage in a conversation between a user and a virtual agent or chatbot.
Each page contains a set of related intents, which represent the user’s intent at that stage of the conversation. For example, a page in a travel booking application might include intents for “Search for Flights”, “Select Travel Dates”, and “Choose a Destination”.
Pages can also contain various other elements, such as prompts, conditions, and fulfillment logic, which determine how the conversation flows and how the chatbot responds to user input. For instance, a prompt might ask the user to provide their travel dates, while a condition might check whether the user has already selected a destination.
Pages in Dialogflow CX are typically connected through transitions, which allow the conversation to move from one page to another based on user input or other conditions. This allows chatbot developers to create complex conversation flows that can handle a wide range of user inputs and scenarios.
Overall, pages are a key concept in Dialogflow CX and play a critical role in designing effective and engaging chatbot conversations.
Steps to create:
To create a new page select the build tab and click the + symbol from the pages drop-down menu. Enter the page name and save it.

6. What is Flow?
A flow is a collection of related pages that represent a complete conversation or workflow. A flow defines the overall structure of the conversation between a user and a virtual agent or chatbot, and it determines how the chatbot responds to user input and advances the conversation.
A flow typically represents a specific use case or scenario, such as booking a hotel room or ordering food from a restaurant. Each flow consists of one or more pages, each of which represents a step or stage in the conversation.
Flows in Dialogflow CX can contain various elements, such as intents, entities, prompts, conditions, and fulfillment logic, which determine how the chatbot interprets user input and generates responses. For example, a flow for booking a hotel room might include pages for selecting a destination, choosing a check-in and check-out date, and selecting a room type, each with its own set of intents, prompts, and conditions.
Flows in Dialogflow CX can also include transitions, which define how the conversation flows from one page to another based on user input or other conditions. Transitions allow chatbot developers to create complex conversation flows that can handle a wide range of user inputs and scenarios.
Overall, flows are a critical concept in Dialogflow CX and play a key role in designing effective and engaging chatbot conversations that meet the needs of users and businesses.

Connection of page and Intent:
- Connection of welcome Intent with the start page:
- Set response from Agent responses.

- Create book Appointment Intent
- For this intent, we can add training phrases like:
- Book Appointment
- Book

- Create a “book” page to connect a start page and Integrate a Book Appointment Intent with the start page.
- Select a new route from the start page and select a Book Appointment Intent in it.

- Add Agent response in it.

- Connect a Book page with it.

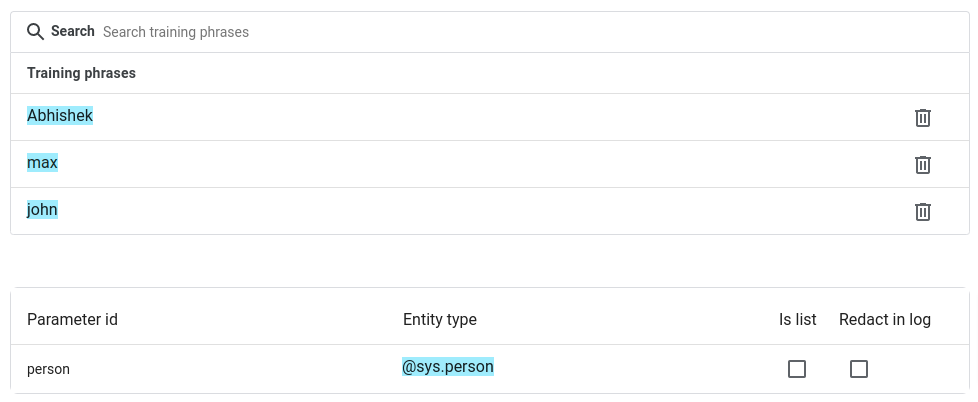
- Create a Name Intent
- Set Parameter as a person to detect a name
- Connect a book page with name intent. And set the agent response as the below image.

- Set a route with a name intent.
- Created a “book date” page and connected it with the named intent.
- In the Dialogflow ES, we can not re-use the same intent meaning even for the confirmation flow like Yes and No response we need to create a new intent every time we need it whereas in Dialogflow CX we can reuse the same intent again and again.
- Follow these steps for each Intent and page to complete a flow.
Feel free to comment your doubts/questions. We would be glad to help you. If you are looking for Chatbot Development or Natural Language Processing services then do contact us or send your requirement at letstalk@pragnakalp.com. We would be happy to offer our expert services.
I am an employee and developing a chatbot using Dialogflow CX for my organization. Not much expert guidance is available.
I have created a sample process-flow for Gaming industry from Start Page – User ID – User Info – Options. A this Options page, the end-user needs to select any 1 of the 9 tabs/chips to facilitate the conversation flow. At this same page – Options, am getting stuck —in the sense that based on User Selection Option 1, the flow is smooth. However, it fails to recognize other 7 options by giving an error message.
In the Options the 7-8 Options include: a) Game Rules; b) Game Scores & Rewards c) Financial Transactions d) In-App Merchandise Purchases e) Advertisements & Banners etc… I have placed all these choices under “Route Groups” as Smart Chips/Tabs that needs to be clicked by the end-user. Based on the tab selection at Options page, the “Flow” option has been selected wherein the conversation flows from Options tab to either of the above menus as Flows.
Only the 1st flow i.e. Option 1 – Game Rules has a proper flow whereas other options 2-7 go unrecognized with error.
So in brief, should the above 6-7 options be retained as Route Groups & transition as a Flow? Or should the above 6-7 options be marked as routes & transition as a flow? Which one is correct???
Or is there any other appropriate method for the process flow? Do let me know. Thanks in advance!!!
Hello, Sameer RS
Have you created routes using Parameters or Intent?